step 2: Setting up the scene
- Open a new scene and create a Camera
- Go on the Attributes Editor and scroll down to the Environment section
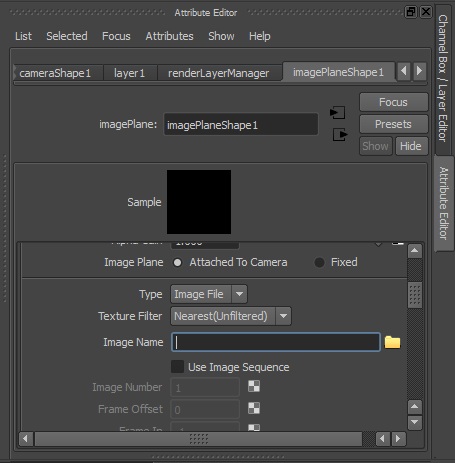
- Under Image Plane click on Create. This will open up in a new tab
- Scroll down on the imagePlaneShape tab to the Image Name box and click on the yellow folder icon to browse for your reference image
TIP: Make sure you select the photograph that has cube in it
Reference cube
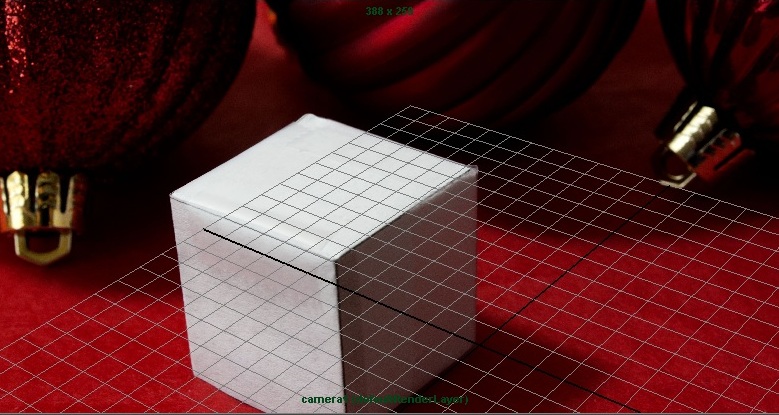
- Select the camera view under the Panels menu inside the viewport
- Match the center point of the grid to the back right corner of the cube in the photograph (click on image to enlarge)
Perspective
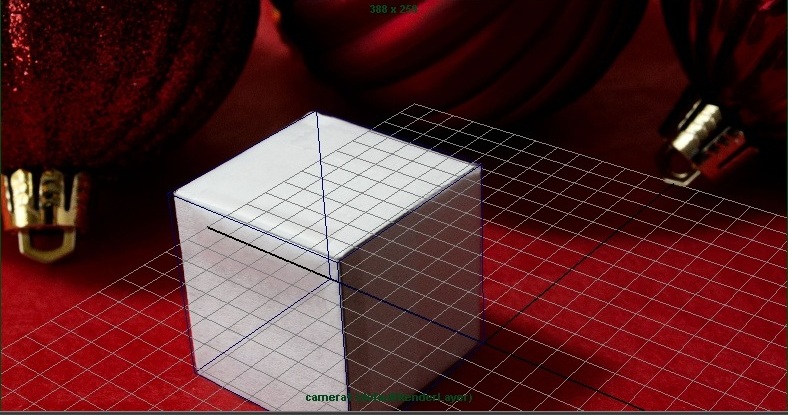
- Create a cube to start matching your scene to the photograph
- Adjust the pivot point of the cube to be in the back right corner and lock it to the center of the grid
- Set the focal length under the camera attributes. (Look up the digital conversion for the specific camera model)
- Start rotating and scaling the cube to get it as close as possible to match the one in the photograph
- Go to the Attributes Editor and find the Transform Attributes settings under the cube tab. You can hit ctrl + right click and drag on these to have more control of the adjustments. This will also help you rotate on the Z axis.
- Remember that the lower the focal length, the more distortion you get.
- If you can't get the whole box to fit, try getting the closest side to be as perfect as possible
